First Time Homeowner Checklist: Everything You Need to Know

This first time homeowner checklist begins the moment you receive those shiny new keys. Standing at the door to your very first house, practically bouncing with excitement as you unlock it for the first time — you’ve done it. You’re a homeowner!
That euphoric feeling often fades quickly once you start wandering around your new place, really looking at everything without the pressure of a showing. Suddenly, you’re staring at mysterious switches, unfamiliar panels, and a whole lot of “what the heck is that supposed to do?” moments.
The reality hits hard: every pipe, wire, shingle, and floorboard is now yours to maintain, repair, and worry about. This checklist will walk you through every critical task to protect your investment, ensure family safety, and create the comfortable home you’ve always wanted.
First Time Homeowner Checklist: Interior Essentials
Your home’s interior systems form the foundation of daily comfort and safety. This section covers the most critical interior priorities that cannot wait.
Safety First: Non-Negotiable Priorities
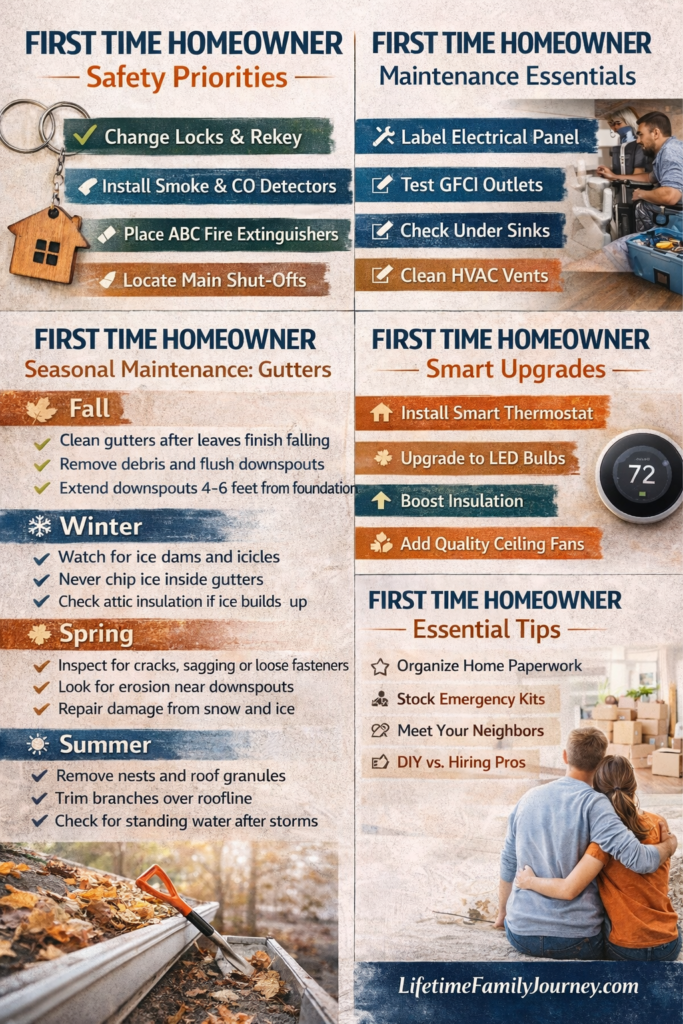
Some tasks simply cannot wait. These safety priorities should be completed within your first week of homeownership.
🔒 Change locks and rekey all doors immediately. You have absolutely no idea how many copies of your keys exist from previous owners, contractors, real estate agents, or family members. This single step gives you complete control over who can access your home and should be your very first priority.
🚨 Test every smoke alarm and understand the different types. Most homes have basic ionization smoke detectors, but adding photoelectric detectors as well is strongly recommended. Ionization alarms respond faster to flaming fires, while photoelectric alarms detect smoldering fires more quickly. According to the National Fire Protection Association, having both types gives your family maximum protection against all fire scenarios.
💨 Test all carbon monoxide detectors with both plug-in and battery backup. Carbon monoxide is an invisible, odorless killer that claims hundreds of lives annually. Test every detector in your home and replace batteries immediately if needed. If you don’t have detectors near bedrooms and fuel-burning appliances, install them now.
🔥 Place ABC-rated fire extinguishers strategically throughout your home. You need extinguishers in the kitchen, garage, and near bedrooms at minimum. Don’t just buy them — learn how to use them properly using the PASS method (Pull, Aim, Squeeze, Sweep) and check pressure gauges annually. Learn more about comprehensive home safety tips that every parent needs.
📍 Locate and clearly identify your main shut-offs. Find your main water shut-off valve, gas shut-off valve, and electrical breaker panel. In an emergency, knowing these locations could prevent thousands of dollars in damage or save your family’s life. Mark them clearly and make sure every family member knows where they are.
Electrical System Deep Dive
Most homeowner responsibilities involve electrical safety, yet many guides skip these critical details until problems arise.
⚡ Label every single breaker in your electrical panel. Previous owners often leave useless labels like “upstairs stuff” or “kitchen maybe.” Turn off each breaker individually and test what loses power to create accurate, specific labels. This saves hours during future repairs and renovations.
🔌 Test all GFCI outlets in kitchens, bathrooms, and garages. Ground Fault Circuit Interrupter outlets prevent electrocution by instantly shutting off power when they detect electrical imbalances. Press the test button, then the reset button on each GFCI outlet to ensure proper operation.
🔍 Check thoroughly for frayed cords and overloaded outlets. Look behind furniture and appliances for damaged electrical cords or extension cords. Ensure outlets aren’t overloaded with multiple power strips daisy-chained together, which creates serious fire hazards.
Plumbing System Assessment
Water damage ranks among the most expensive problems homeowners face. This section prevents small issues from becoming catastrophic failures.
🚿 Inspect under every sink and around all toilets for leaks. Even tiny drips can cause massive damage over time. Look for water stains, soft spots in flooring, warped cabinets, or musty odors that indicate hidden moisture problems requiring immediate attention.
💧 Test water pressure and temperature at all faucets throughout the house. Low pressure might indicate clogged aerators, mineral buildup, or serious plumbing issues. Ensure hot water reaches every fixture consistently and that temperatures remain stable during use.
🚽 Flush every toilet and thoroughly check fill valves. Listen for continuous running water, verify tanks fill and stop properly, and ensure toilets don’t rock or move when you sit on them. A loose toilet can damage flooring and create expensive water damage.
🔥 Check your water heater temperature setting. The optimal temperature is 120°F for safety and efficiency according to the Department of Energy. Higher temperatures waste energy and increase scalding risk, especially for children, while lower temperatures don’t effectively kill harmful bacteria.
HVAC System Maintenance
Your heating, ventilation, and air conditioning system represents one of your home’s most expensive mechanical components.
🌡️ Change or clean all air filters immediately and establish a regular schedule. Dirty filters reduce efficiency, increase energy costs, and can damage your entire system. Check filters monthly and replace them at least every three months, more frequently during heavy usage periods.
🔧 Schedule professional inspections for both heating and cooling systems. Even if everything appears to function correctly, trained technicians can identify potential problems before they become expensive emergencies. Annual maintenance extends system life significantly.
🌪️ Clean all supply and return vents thoroughly. Remove vent covers and vacuum out accumulated dust, debris, and pet hair. This improves airflow, enhances indoor air quality, and reduces strain on your HVAC system.
🌬️ Check for drafts around registers and visible ductwork. Air leaks waste energy and reduce comfort. Seal gaps with appropriate materials to improve system efficiency and reduce monthly energy costs.
General Interior Maintenance Tasks
These seemingly small details make an enormous difference in daily comfort and long-term home value preservation.
🎨 Paint or touch up walls before moving furniture in. Working around furniture is incredibly frustrating and produces inferior results. Focus on high-traffic areas and rooms needing the most improvement first, then tackle remaining spaces systematically.
🚪 Address all squeaky doors and loose handles immediately. A few drops of lubricating oil on hinges eliminates annoying sounds, while tightening hardware prevents complete failure. These simple fixes improve daily comfort significantly.
🔧 Lubricate all hinges, locks, and moving hardware. Regular lubrication prevents corrosion, ensures smooth operation, and extends hardware life through changing seasons and weather conditions.
Kitchen and Bathrooms: Function and Prevention
These high-use, high-moisture areas require special attention to prevent problems and ensure optimal functionality.
Kitchen Deep Preparation
🧽 Deep clean all appliances thoroughly before first use. Previous owners may have left behind grease buildup, food residue, or harsh cleaning chemicals. Start fresh with comprehensive cleaning of ovens, refrigerators, dishwashers, and microwaves to ensure food safety and optimal performance. For effective cleaning techniques, check out natural cleaning methods that actually work.
💧 Replace all water filters in refrigerators and under-sink systems. Old filters harbor bacteria, reduce water quality, and may contain contaminants from previous usage. Install fresh filters and establish replacement schedules to maintain clean, safe drinking water.
🌪️ Test range hood ventilation system thoroughly. Ensure the fan effectively removes smoke, steam, and cooking odors. Clean or replace filters and verify that exterior vents aren’t blocked by debris or pest nests.
🔥 Clean oven heating elements and all stovetop burners. Remove manufacturing residue, previous owner’s cooking buildup, and any debris that could cause smoke or unusual odors during your first cooking sessions.
Bathroom Safety and Maintenance
🚿 Check all caulking around tubs, showers, and sink installations. Damaged or missing caulk allows water infiltration behind tiles and fixtures, causing expensive structural damage, mold growth, and potential health hazards requiring professional remediation.
💨 Test all exhaust fans for proper airflow and noise levels. Bathroom ventilation prevents moisture buildup that leads to mold, mildew, and structural damage. Fans should move air effectively without excessive noise indicating motor problems.
🚽 Inspect toilet bases thoroughly for leaks and structural stability. Look for water accumulation around bases, soft flooring spots, or toilets that shift when occupied. These issues worsen rapidly and require immediate professional attention.
🔥 Test water temperature safety systems in all showers and tubs. Install anti-scald devices if water reaches dangerous temperatures. This protection is especially critical for households with young children or elderly family members.
Bedrooms and Living Spaces: Comfort and Efficiency
Creating comfortable, efficient living environments transforms your house into a true home.
🌙 Install blackout or thermal curtains for improved sleep and energy savings. Quality window treatments significantly improve temperature control, create optimal sleeping environments, reduce outside noise, and decrease monthly energy expenses through improved insulation.
🌪️ Test all ceiling fans and learn seasonal direction changes. Fans should rotate counterclockwise during summer to create cooling air circulation and clockwise during winter to push warm air downward from ceiling areas.
🪟 Inspect all windows for drafts, damage, and security functionality. Verify that locks operate smoothly, weatherstripping remains intact, and glass shows no cracks or damage. Address security and efficiency issues before weather changes create bigger problems.
Basement and Crawl Space: Foundation Protection
These often-neglected areas play crucial roles in your home’s structural integrity.
🏗️ Check thoroughly for foundation cracks and settlement indicators. Small hairline cracks often represent normal settling, but larger or growing cracks require professional evaluation. Document existing conditions with photographs for future reference and monitoring.
💧 Look systematically for moisture signs, mold growth, or water damage. Check for water stains, musty odors, visible mold, or damp conditions. Address moisture problems immediately before they spread throughout your home’s structure and create health hazards.
⚡ Test sump pump operation and clean the collection pit. Pour water into the sump pit to verify pump activation and proper drainage. Clean debris from the pit and ensure float switches operate correctly to prevent basement flooding.
🛡️ Ensure vapor barriers remain intact in crawl space areas. Plastic sheeting on crawl space floors prevents ground moisture from entering your home’s structure. Repair tears or replace damaged barriers to maintain moisture control.
🧊 Inspect insulation on all plumbing pipes in unheated areas. Proper pipe insulation prevents costly freeze damage and improves overall energy efficiency. Add insulation where needed, particularly in areas exposed to cold temperatures.
Attic Assessment: Insulation and Ventilation
Your attic significantly impacts energy efficiency and home comfort.
🧊 Check insulation depth and coverage throughout the entire attic space. Most homes require 12-15 inches of insulation for optimal energy efficiency according to Energy Star guidelines. Look for gaps, compressed areas, or insufficient coverage requiring additional insulation installation.
💧 Look systematically for roof leak signs or moisture intrusion. Check for water stains on rafters, damp insulation, or actual water penetration. Address roofing problems immediately before they cause extensive structural damage or mold growth.
🌬️ Ensure all ventilation systems remain clear and functional. Soffit vents, ridge vents, and gable vents work together maintaining proper attic airflow. Remove obstructions and add ventilation capacity if current systems prove inadequate.
🐭 Look carefully for pest nests, droppings, or structural damage. Rodents and insects frequently establish attic colonies. Address infestations quickly and seal entry points to prevent recurring problems and potential health hazards.
Exterior: Curb Appeal and Protection
Your home’s exterior serves as the primary defense against weather.
Roof and Gutter Maintenance
🏠 Inspect shingles, flashing, and roof vents systematically. Look for loose, damaged, or missing shingles requiring immediate attention. Check that flashing around chimneys, vents, and roof penetrations remains secure and watertight.
🌧️ Clean gutters and downspouts completely of all debris. Remove leaves, twigs, and accumulated sediment that prevents proper water drainage. This single maintenance task prevents expensive foundation damage, basement flooding, and roof deterioration.
💧 Ensure all downspouts extend adequate distance from foundation walls. Water should discharge at least 4-6 feet from your house to prevent basement flooding, foundation settling, and structural damage during heavy rainfall periods.
Siding, Paint, and Exterior Surface Care
🧽 Power wash siding, decks, walkways, and exterior surfaces. Remove accumulated dirt, mildew, pollen, and stains that have built up over time. This maintenance improves appearance dramatically while preventing permanent surface damage.
🎨 Seal gaps and cracks before moisture infiltration occurs. Use appropriate caulks and sealants around windows, doors, and trim pieces. This prevents water damage while significantly improving energy efficiency and interior comfort.
🖌️ Touch up or repaint exposed areas showing wear or damage. Protect wood surfaces with quality paint or stain applications. Prioritize areas receiving the most weather exposure to prevent costly structural repairs later.
Windows, Doors, and Entry Point Security
🚪 Check weatherstripping around all doors and windows thoroughly. Replace damaged, compressed, or missing weatherstripping to improve energy efficiency, reduce drafts, and enhance interior comfort throughout changing seasons.
🔍 Inspect seals systematically for air and water leak indicators. Use smoke from incense or candles to detect air leaks around windows and doors. Seal discovered gaps to improve efficiency and prevent moisture problems.
🔧 Lubricate all locks, hinges, and moving hardware components. Regular lubrication prevents corrosion, ensures smooth operation, and extends hardware life through weather changes and seasonal temperature variations.
Foundation and Drainage Systems
🏗️ Grade soil properly away from house foundation walls. Soil should slope away from your home directing water away from foundation areas. Add soil where necessary to create proper drainage gradients preventing water problems.
🌊 Install or verify French drain and gutter extension systems. Proper drainage infrastructure protects your foundation from water damage and prevents expensive basement flooding during heavy rainfall or snowmelt periods.
🔧 Fill small foundation cracks with appropriate sealant materials. Monitor larger cracks for growth or expansion and consult structural professionals if problems worsen or multiply over time.
Lawn, Garden, and Outdoor Spaces
Well-maintained outdoor areas enhance property values and prevent structural problems.
🌱 Establish consistent mowing and edging schedules for optimal lawn health. Regular maintenance keeps grass healthy, prevents weed establishment, and maintains attractive curb appeal throughout growing seasons.
✂️ Trim trees and shrubs away from house structures and overhead power lines. Vegetation should remain at least 3 feet from exterior walls to prevent structural damage, pest problems, and potential safety hazards during storms.
🌳 Remove dead branches that could fall and cause property damage. Dead wood becomes unpredictable during storms and can damage roofs, vehicles, or injure people. Address hazardous branches before weather events create emergencies.
🚧 Maintain fences, gates, and outdoor structural elements regularly. Fix loose boards, replace damaged hardware, and treat wood surfaces to prevent deterioration and maintain property boundaries effectively.
🏞️ Inspect decks and patios for loose boards, protruding nails, or structural concerns. Address safety hazards immediately and establish regular maintenance schedules to extend outdoor living space lifespans significantly.
🌊 Store hoses and irrigation equipment properly to prevent freeze damage. Drain and store hoses during cold weather to prevent cracking and splitting that requires complete replacement.
💧 Winterize irrigation systems in climates with freezing temperatures. Blown-out water lines prevent expensive freeze damage to underground sprinkler systems and associated repair costs.
Garage and Outbuildings: Organization and Safety
These utility spaces require attention to safety systems and organization.
🚪 Test garage door auto-reverse safety features regularly. Place a board under closing doors to verify proper reversal operation. This critical safety feature prevents serious injuries, particularly to children and pets.
🔧 Lubricate garage door tracks, rollers, and hardware components. Regular maintenance prevents premature wear, reduces operational noise, and extends overall system life significantly.
🧰 Organize tools and supplies systematically for emergency access. Create designated storage areas for everything so you can locate needed items quickly during emergencies or urgent repair situations.
🏠 Check shed roofs and walls for leaks or structural damage. Outbuildings require maintenance too. Address problems before they damage stored equipment, tools, or seasonal items requiring expensive replacement.
First Time Homeowner Checklist: Seasonal Maintenance Calendar
Consistent seasonal maintenance prevents small problems from developing into expensive emergencies.
🌸 Spring Preparation Tasks
- Schedule air conditioning system tune-ups before peak usage periods
- Conduct comprehensive roof and exterior inspections after winter weather
- Clean windows thoroughly and replace damaged screens
- Check and repair any winter storm damage
☀️ Summer Maintenance Focus Areas
- Implement comprehensive pest control measures before infestations establish
- Check lawn irrigation systems and adjust for changing weather patterns
- Seal decks and outdoor wood surfaces during optimal weather conditions
- Inspect and maintain outdoor equipment
🍁 Fall Winterization Tasks
- Schedule furnace tune-ups and replace filters before heating season
- Clean gutters thoroughly after leaves fall but before winter weather arrives
- Seal driveways and repair cracks before freeze-thaw cycles cause expansion
- Prepare winter equipment and supplies
❄️ Winter Protection Measures
- Insulate pipes in unheated areas and install heating cables where necessary
- Test and maintain snow removal equipment before first snowfall
- Seal drafts around windows and doors to improve heating efficiency
- Monitor for ice dam formation and address promptly
Comfort and Energy Efficiency: Smart Upgrades
Strategic improvements dramatically enhance daily comfort while reducing monthly expenses.
🌪️ Install ceiling fans for improved air circulation throughout living areas. Quality fans allow higher thermostat settings during summer and lower settings during winter while maintaining optimal comfort levels.
💡 Upgrade to LED light bulbs throughout your entire home. LEDs consume significantly less energy, last much longer than traditional bulbs, and reduce electricity costs immediately while providing superior lighting quality.
🧊 Add insulation to attics and crawl spaces where measurements indicate deficiencies. Proper insulation represents one of the most cost-effective energy improvements available, providing immediate comfort and cost benefits.
📱 Install programmable or smart thermostats for automated temperature control. Advanced temperature control reduces energy waste when spaces are unoccupied while maintaining comfort when needed. According to Energy.gov’s Energy Saver guide, proper thermostat management can significantly reduce energy costs.
Emergency Preparedness: Family Safety Planning
Comprehensive emergency preparation protects your family while providing peace of mind.
📋 Create detailed evacuation and communication plans for various emergency scenarios. Every family member should understand escape routes, meeting locations, and communication procedures if separated during emergencies. For comprehensive guidance, visit Ready.gov’s official emergency planning resources.
🎒 Stock comprehensive emergency kits with essential supplies for extended periods. Include flashlights, batteries, water storage, blankets, first aid materials, battery-powered radios, and non-perishable food for several days of self-sufficiency.
🏠 Identify safe rooms or storm shelters for severe weather protection. Know the strongest, most protected areas of your home for different emergency types, particularly severe storms and potential intruder situations.
🚑 Maintain well-stocked first aid supplies in accessible locations. Basic medical supplies handle minor injuries effectively while providing critical care during serious emergencies before professional help arrives. The CDC’s safety guidelines provide comprehensive information on home safety for families with children.
Paperwork and Records: Documentation Management
Proper documentation protects your investment and streamlines insurance processes.
📄 Store mortgage documents, insurance policies, warranties, and inspection reports securely. Use fireproof safes or bank safety deposit boxes for original documents while maintaining easily accessible copies for daily reference.
💾 Create comprehensive digital backups of all important documentation. Cloud storage ensures access to critical information even if physical documents are damaged, destroyed, or inaccessible during emergencies.
📝 Record appliance serial numbers, model information, and save all instruction manuals. This documentation streamlines warranty claims, helps technicians during repairs, and provides essential information for insurance purposes.
📸 Take comprehensive photographs of your home’s interior, exterior, and valuable possessions. Document current conditions and valuable items for insurance purposes, providing crucial evidence if claims become necessary.
Tools Every Homeowner Needs: Essential Equipment
Having proper tools makes home maintenance significantly easier.
🔨 Basic hand tools represent absolute essentials for routine maintenance. Quality hammers, screwdrivers, pliers, and adjustable wrenches handle countless routine tasks from hanging pictures to minor repairs throughout your home.
⚡ Invest in quality cordless drills with comprehensive bit sets. This versatile tool handles numerous tasks from furniture assembly to minor construction projects, eliminating dependence on others for basic tasks.
🪜 Purchase sturdy ladders appropriate for your home’s height and configuration. Never compromise on ladder safety — invest in quality equipment that provides secure access to elevated areas throughout your property.
📏 Maintain measuring tools and marking supplies for project accuracy. Tape measures, levels, and marking tools are essential for virtually every home improvement project, ensuring professional-quality results.
🧹 Own shop vacuums for heavy-duty cleaning tasks. Regular household vacuums cannot handle construction debris, significant water cleanup, or workshop messes that homeowners regularly encounter.
🌱 Acquire appropriate lawn care equipment based on property requirements. Equipment needs vary significantly based on property size, terrain, and landscape complexity, but basic tools maintain attractive outdoor spaces.
When to DIY and When to Call a Professional: Making Smart Decisions
Understanding your limitations prevents dangerous mistakes while maximizing budget effectiveness.
Safe DIY Projects for New Homeowners
✅ Painting projects offer excellent starting points for developing skills. Interior and exterior painting saves significant money while providing complete control over home appearance and building confidence for future projects.
✅ Caulking and basic sealing work require minimal tools but provide substantial benefits. These projects significantly improve comfort and efficiency while developing practical skills applicable to numerous future situations.
✅ Fixture replacement and basic hardware upgrades are manageable for most homeowners. Swapping light fixtures, cabinet hardware, and plumbing fixtures provides immediate improvements while building practical experience.
✅ Basic landscaping and garden maintenance develop outdoor skills. Planting, mulching, and routine yard work are manageable for most people while significantly improving property appearance and value.
When Professional Contractors Are Essential
🚫 Electrical work beyond basic fixture replacement requires licensed professionals. Rewiring, panel upgrades, and complex electrical installations require professional expertise for safety, code compliance, and insurance requirements.
🚫 Major structural repairs or modifications need engineering expertise. Foundation work, load-bearing wall modifications, and structural issues require professional assessment and specialized knowledge for safe completion.
🚫 Complex plumbing projects and major leak repairs exceed DIY capabilities. While fixture replacement is manageable, major pipe work requires professional tools, knowledge, and licensing for proper completion.
🚫 Roofing repairs and HVAC system work present significant safety and complexity challenges. These systems require specialized knowledge, tools, and safety equipment beyond typical homeowner capabilities.
Community Familiarization: Becoming a Great Neighbor
Building positive community relationships enhances quality of life and improves property values.
👋 Introduce yourself personally to immediate neighbors and establish positive relationships. Good neighbor relationships improve security, create mutual support systems, and enhance overall neighborhood quality for everyone involved.
🗺️ Locate essential services and businesses in your new community area. Find closest grocery stores, gas stations, hardware stores, medical facilities, and emergency services for convenient daily living and emergency preparedness.
🗓️ Learn local waste collection, recycling schedules, and community regulations. Proper waste management maintains property appearance, prevents violations, and demonstrates community responsibility to neighbors and local authorities.
🏛️ Understand local ordinances, homeowners association rules, and community expectations. Compliance prevents fines, conflicts, and legal issues while maintaining positive relationships with neighbors and local government authorities.
Final Thoughts: Your First Time Homeowner Checklist Journey
This comprehensive first time homeowner checklist represents the foundation of successful homeownership, covering every essential task from safety priorities to community integration. Remember that maintaining a home is an ongoing journey rather than a one-time event, so use this first time homeowner checklist as your reference for systematic home management.
The key to success lies in prioritizing safety items first, then systematically working through comfort and efficiency improvements as time and budget allow. Don’t feel overwhelmed by trying to accomplish everything immediately — even experienced homeowners tackle these tasks gradually over time.
Stay proactive rather than reactive by establishing regular maintenance routines. Consistent attention to these details prevents small problems from becoming expensive emergencies while building the skills and confidence that make homeownership rewarding rather than stressful.
This first time homeowner checklist covers everything you need to protect your investment, ensure family safety, and create the comfortable living environment you envisioned when you decided to buy your first home.
More from the Blog
- Tidy in Ten – 7 Simple Fixes to Clean Your House Fast
- Family Routines That Work – 7 Simple Fixes for a Calmer Day
- Home Cleaning Tips That Actually Work for Busy Families
- Building Family Traditions That Actually Matter
Explore More from Our Family of Blogs
Mountains Will Move
Faith-based encouragement for everyday families.
Everyday Exposed
No-filter truth hub for critical thinking and clarity.
Thank you for being part of the community. God Bless you and your family.