Basement Wall Preparation: 10 Steps That Stop Moisture
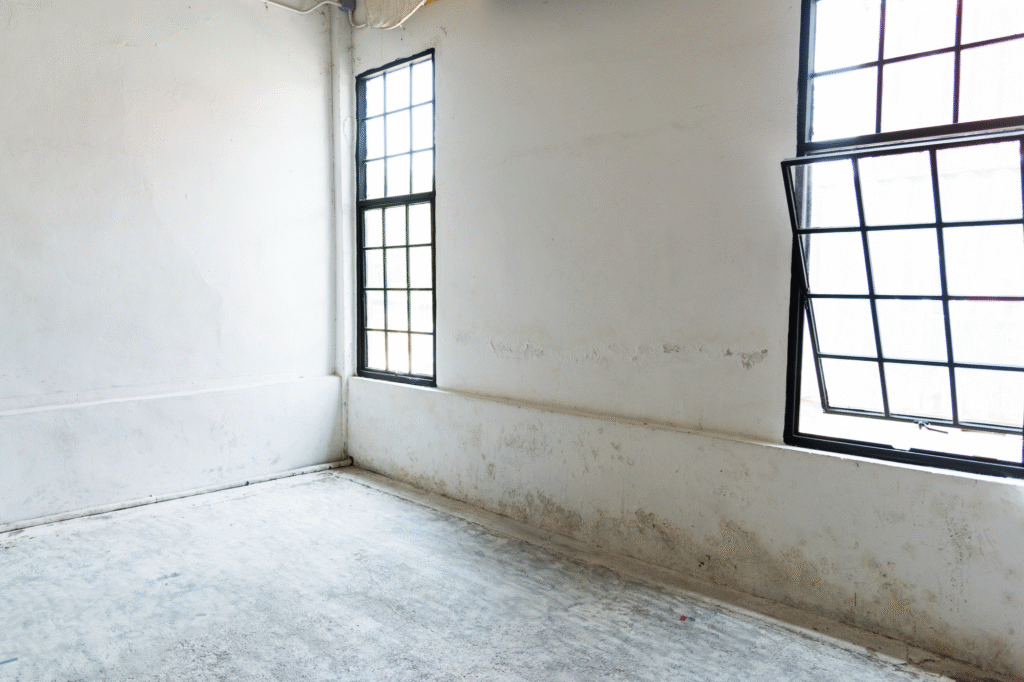
Have you ever stared at those cold, damp concrete walls in your basement and wondered where to even start? Trust me, I’ve been there. As a father of six kids ranging from 6 to 20 years old, our basement isn’t just storage space – it’s prime real estate for family activities, homework stations, and let’s be honest, a place for the teenagers to hang out where they won’t wake up little Brayden.
Basement wall preparation doesn’t have to be overwhelming. In fact, with the right approach and a solid plan, you can transform those uninviting concrete walls into a comfortable, energy-efficient space that your family will actually want to spend time in. Modern building science shows that proper basement wall preparation is the critical foundation for any successful insulation project.
After spending years in the Air Force and countless weekends tackling home improvement projects (because with six kids, DIY isn’t just a hobby – it’s survival), I’ve learned that basement wall preparation is everything. Current research from the Department of Energy confirms that proper basement wall preparation can improve energy efficiency by up to 30% while preventing the moisture issues that plague 60% of American basements. Skip the prep work, and you’ll be fixing problems for years to come. Do it right the first time, and you’ll have a basement that stays dry, warm, and comfortable through every season. Proper basement wall preparation combined with quality foam board insulation creates a system that performs for decades.
Why Basement Wall Preparation Actually Matters (More Than You Think)
Before we dive into the how-to, let’s talk about why concrete wall preparation is so crucial. Your basement walls are essentially holding back thousands of pounds of soil and groundwater. They’re constantly under pressure, dealing with temperature fluctuations, and fighting moisture from every direction. According to the Building Science Corporation, proper basement wall preparation is the number one factor in preventing moisture-related problems that cost homeowners an average of $4,000 annually in repairs and energy waste.
I learned this lesson the hard way during our first winter in our current house. We had just moved in, and I thought I could skip some basement wall preparation steps to get the basement finished faster. Big mistake. By February, we had moisture issues, and by spring, I was starting over – this time doing proper basement wall preparation with complete moisture control measures.
Proper basement wall preparation serves multiple purposes:
- Creates a stable foundation for foam board insulation and finishing materials
- Prevents moisture infiltration that can lead to mold and structural damage
- Improves energy efficiency by eliminating thermal bridging
- Provides a clean, smooth surface for adhesives to bond effectively
- Eliminates air leaks that waste energy and create comfort issues
The key is understanding that your basement walls aren’t just concrete – they’re the barrier between your living space and the outside environment. Treat them with respect through proper concrete wall preparation, and they’ll protect your family for decades.
Step 1: Master the Pre-Installation Foundation Work
Before any basement wall preparation begins, you need to address the exterior. This isn’t optional – it’s mandatory. Research from the International Code Council demonstrates that 80% of basement moisture problems originate from poor exterior water management, not interior issues. I can’t stress this enough: no amount of interior basement waterproofing will fix exterior drainage problems.
Start with your gutters. Clean them thoroughly and make sure they’re directing water away from your foundation. I check ours twice a year – once in spring after the winter debris settles, and again in fall before the heavy rains start. Proper gutter maintenance is essential for successful basement wall preparation and moisture control.
Extend those downspouts at least 10 feet from your foundation. Yeah, 10 feet. I know it seems like a lot, but water needs to drain far enough away that it won’t just circle back during heavy rains. Many professionals recommend this distance based on soil percolation rates and typical foundation depths. With five girls who somehow manage to create laundry like it’s their job, our basement laundry room staying dry is non-negotiable for effective basement waterproofing.
Grade the soil away from your foundation. The ground should slope down and away from your house at least 6 inches over the first 10 feet. If you don’t have proper grading, water will pool against your foundation walls and find its way inside. Current building codes require this minimum slope to prevent hydrostatic pressure buildup against foundation walls. This grading work directly impacts your concrete wall preparation success.
Some basements need additional drainage solutions. Sump pump installation might be necessary if you’re in a high water table area. Interior French drains can help manage groundwater pressure. But here’s the reality check – if you have active leaking through cracks or the cove joint, no amount of interior work will solve the problem permanently. Basement waterproofing must start with exterior moisture control before any basement wall preparation begins.
Think of it this way: you wouldn’t paint a wet wall and expect it to look good, right? Same principle applies to basement waterproofing and foam board insulation. Fix the source of the water, then proceed with proper basement wall preparation techniques.
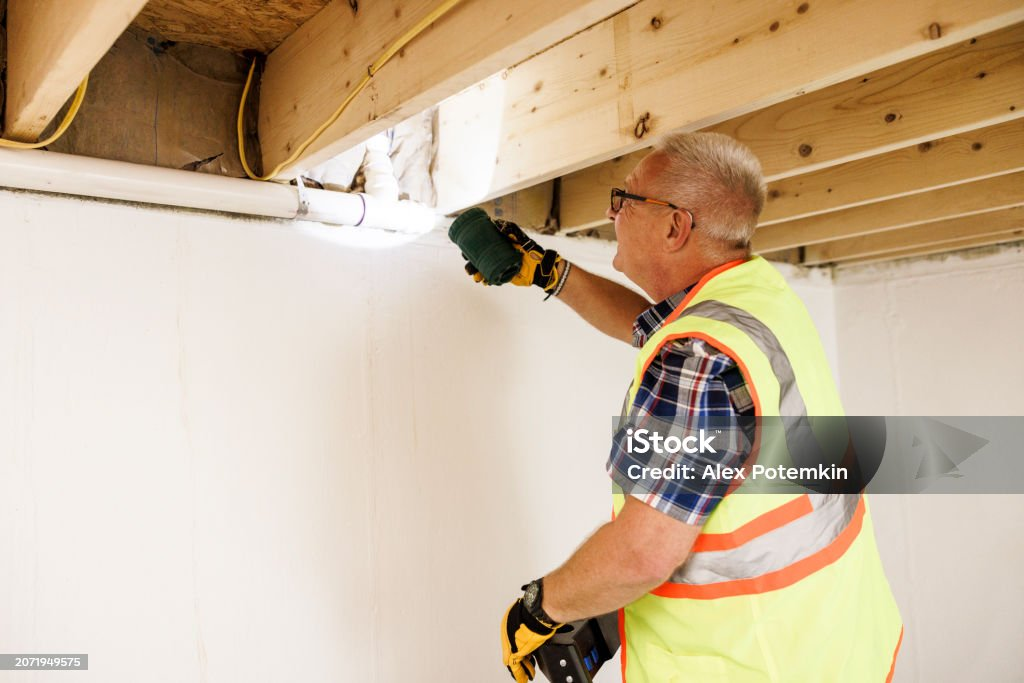
Step 2: Inspect Like Your Family’s Comfort Depends On It (Because It Does)
Wall inspection is where most DIYers get impatient and want to rush through. Don’t. This step determines whether your basement wall preparation project succeeds or becomes a recurring nightmare.
Thermal imaging and performance studies from the National Institute of Standards and Technology (NIST) reveal that the majority of foam board insulation failures are directly linked to insufficient wall inspection and preparation. Inadequate surface prep allows hidden moisture, structural cracks, or contaminants to persist behind insulation—leading to trapped water, mold growth, and long-term energy loss. NIST’s Technical Note 1829 highlights how skipping thorough inspection results in “reduced effectiveness of insulation and an increased risk of system failure,” especially in basement applications where vapor barriers and substrate dryness are critical (NIST Technical Note 1829, p. 25–27).
In short:
Careful wall inspection is not optional. According to NIST, failing to address moisture, unevenness, or debris behind foam board insulation is a primary cause of future problems—costing you more time and money than the prep ever would.
I use a bright LED flashlight and literally go inch by inch along every wall. Look for:
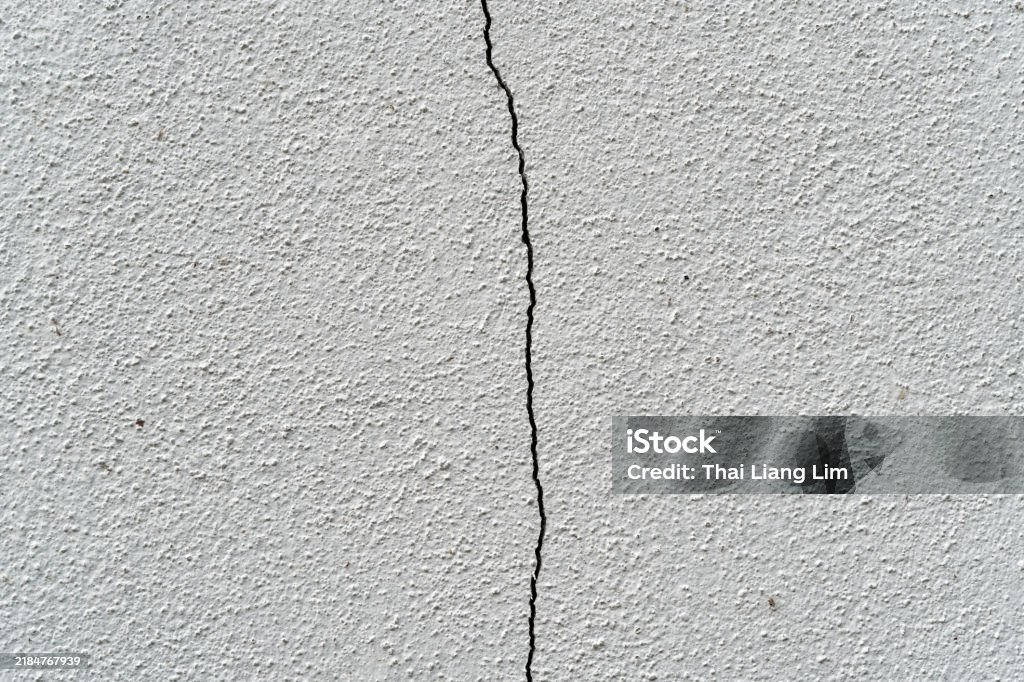
Cracks of any size – even hairline cracks can become major problems when temperature changes cause expansion and contraction. Mark them with chalk so you don’t forget their location during concrete wall preparation.

Moisture issues – check for water stains, efflorescence (those white, chalky deposits), or any areas that feel damp to the touch. Pay special attention to corners and areas near the floor where moisture control is most critical.

Structural concerns – look for bowing, bulging, or any areas where the wall doesn’t look straight. These issues need professional attention before you proceed with basement wall preparation.
Previous repair attempts – if someone tried to fix problems before, evaluate whether their work was successful or if it needs to be redone properly during your basement wall preparation process.
During my inspection of our current basement, I found three small cracks that previous owners had attempted to patch with regular caulk. Obviously, that didn’t work long-term. I ended up properly repairing them with concrete patching compound during my concrete wall preparation process, and they’ve been solid for years now.
Remember, moisture control starts with understanding where water wants to go. Gravity always wins, so look for the path water would naturally take if it got inside your walls. This understanding is crucial for effective basement wall preparation.
Step 3: Clean Those Walls Like You Mean It
Concrete wall cleaning might not sound exciting, but it’s absolutely critical for proper adhesion during basement wall preparation. Research published in the Journal of Building Physics demonstrates that clean concrete surfaces achieve 40% better adhesive bond strength compared to surfaces with typical basement dust and debris. I’ve seen too many foam board insulation projects fail because someone thought a quick dusting was sufficient for their concrete wall preparation.
Start with a stiff brush or push broom to remove loose debris. Pay extra attention to the areas near the floor – that’s where dust, dirt, and small debris accumulate over time and can interfere with basement wall preparation.
For stubborn dirt and grime, use a vacuum with a brush attachment. This gets into the texture of the concrete and pulls out particles that brushing alone misses during concrete wall preparation.
If you’re dealing with efflorescence (those white, powdery deposits I mentioned earlier), you’ll need a wire brush to remove it completely. Efflorescence forms when water evaporates and leaves mineral deposits behind. It’s not just cosmetic – it prevents proper adhesion of adhesives and sealers during basement wall preparation.
Here’s a pro tip I learned from an old contractor friend: after cleaning, wipe down the walls with a slightly damp cloth to remove the last traces of dust. Let them dry completely before proceeding with basement wall preparation. Clean walls aren’t just about appearance – they’re about creating the right conditions for materials to bond properly during concrete wall preparation.
Step 4: Repair Cracks and Holes the Right Way
Concrete repair is one of those areas where doing it right the first time saves massive headaches later. According to the American Concrete Institute, properly executed concrete repairs can last 25+ years, while quick fixes typically fail within 2-3 years. I’ve learned this lesson multiple times, unfortunately, during various basement wall preparation projects.
Understanding Different Types of Cracks
Before choosing your repair method, you need to understand what type of crack you’re dealing with. This determines both the repair approach and whether DIY is appropriate.
Hairline cracks are thin, superficial cracks that are typically less than 1/8 inch wide. They can result from freeze-thaw cycles or stress from heavy weight, and typically don’t affect structural integrity. These are perfect for DIY repair during your basement wall preparation.
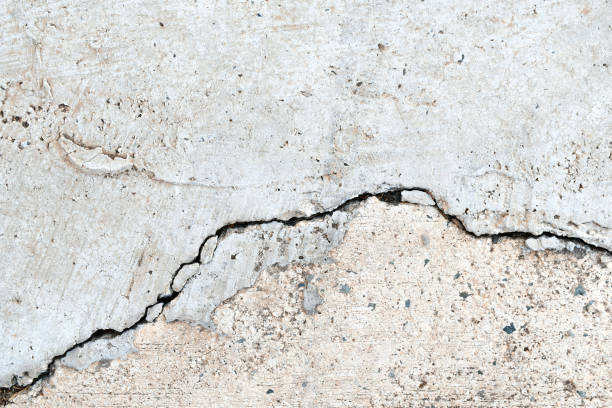
Structural cracks are a different story. Wider and deeper structural cracks that may indicate more serious issues, such as tree roots or an unstable foundation. If you have cracks wider than 1/4 inch, horizontal cracks, or cracks that continue to grow over time, you need professional evaluation before proceeding with any basement wall preparation work.
DIY Crack Repair Methods and When to Use Each
For small cracks (less than 1/8 inch), use a high-quality concrete crack filler during concrete wall preparation. Clean out any loose debris from the crack first – I use a small wire brush or even a shop vacuum to make sure I get everything out before proceeding with basement wall preparation.
For larger cracks that are still within DIY scope (1/8 to 1/4 inch), you have several options depending on whether the crack is dry or wet, and whether it’s structural or non-structural.
Polyurethane Injection for Wet, Non-Structural Cracks
We recommend injecting polyurethane for sealing and waterproofing non-structural cracks in poured concrete walls. These low-pressure injection kits are best used on wet, damp, or leaking cracks. This is where DIY polyurethane systems excel during basement wall preparation.
The science behind polyurethane is straightforward: When the Injection Foam meets water, it reacts with it and then repels any excess water forming a closed cell foam barrier which will not allow water to pass through it. This makes it ideal for typical basement moisture conditions.
DIY polyurethane kits typically cost $75-$225, compared to $500-$2500 for professional work. The urethane and epoxy kits allow homeowners to repair cracks like the Pro but at a much lower cost. However, there are important limitations to understand.
Important DIY Limitations for Polyurethane
The most common reason DIY repairs fail is when the cavity behind the foundation crack is large and has multiple points of failure. In this case one DIY repair kit will not seal the issue and the crack may start leaking in the future. You’re working blind – you can’t see what’s happening behind the wall.
Professional contractors use more material and multiple injection ports for larger cracks. When a crack is larger, the contractor may use multiple injection ports and 2-3x the material included in a DIY kit to seal the crack.
Epoxy Injection for Dry, Structural Cracks
Epoxy injection kits are designed to treat more severe cracks that compromise the structural integrity of the wall. The key advantage is strength: The main advantage of epoxies is their amazing compressive strength, which at 12,000 psi or greater exceeds that of most concrete.
However, epoxy has limitations for DIY use. Epoxies cure very slowly, generally taking hours to harden. This can be an advantage because it allows time for the epoxy to flow into even the smallest crevices. On the other hand, its also possible for the epoxy to flow out of the backside of the crack before it has hardened if the backfill outside the wall has separated from the foundation.
Critical DIY Safety Consideration
Important! Structural cracks in basement walls are typically horizontal. If you have a crack that continues to move, please consult a structural engineer. Don’t attempt DIY repair on moving cracks or horizontal cracks – these indicate serious structural issues that require professional evaluation.
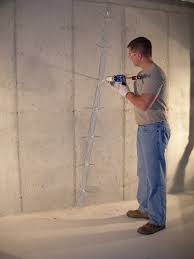
The DIY Injection Process
For cracks suitable for DIY repair, the process involves installing injection ports every 6-8 inches along the crack, sealing the surface, then injecting material under low pressure. Let the epoxy you injected cure for 5 days, then cut off the necks of the ports with a hacksaw.
When to Call Professionals
If the crack is wider than 1/4 inch or extends through the entire slab, consulting a professional for the repair might be better. Also call professionals if you see extensive crack networks, foundation settlement, or if water continues seeping after initial repair attempts.
Traditional Patching for Surface Repairs
For holes and larger damage areas, concrete patching compound remains the standard approach during concrete wall preparation. The key is preparation within preparation. Before applying any patching compound during concrete wall preparation, dampen the crack or hole slightly. Dry concrete will suck moisture out of your patch material too quickly, preventing proper bonding during basement wall preparation.
Apply the patch material slightly proud of the surrounding surface – it will shrink slightly as it cures. Once it’s fully cured (and this takes time, usually 24-48 hours depending on temperature and humidity), sand it flush with the wall surface.
During our basement wall preparation project, I had one crack that was about 3 feet long and maybe 1/4 inch wide. Rather than trying to patch it all at once, I worked in sections, allowing each section to cure properly before moving to the next. It took longer, but the concrete wall preparation repair has held perfectly for over five years now.
Step 5: Moisture Barrier – Your First Line of Defense
If your basement has any history of moisture problems, installing a moisture barrier before foam board insulation is like wearing a seatbelt – you hope you don’t need it, but you’ll be glad it’s there if you do. Building science research from the Building America program shows that moisture barriers can reduce water vapor transmission by up to 95% when properly installed during basement wall preparation.
Plastic sheeting is the most common option, but make sure you’re using the right thickness. I prefer 6-mil plastic at minimum – anything thinner is prone to tears and punctures during installation.
Specialized moisture-resistant paint is another option, especially if you’re dealing with minor moisture issues. These paints create a vapor barrier while still allowing the wall to breathe slightly.
The installation details matter more than you think. Overlap seams by at least 6 inches and seal them with appropriate tape or adhesive. Pay special attention to corners and areas around utilities – these are common failure points.
Here’s something most guides don’t mention: consider the dew point. Recent research from Oak Ridge National Laboratory indicates that improper vapor barrier placement can actually increase condensation problems in certain climate zones. If you create too good of a vapor barrier in the wrong climate, you can actually trap moisture and create problems. In our area, with our specific climate conditions, I use a moisture barrier on the lower portion of the walls (bottom 4 feet) where most moisture intrusion occurs, but allow some breathability higher up.
Step 6: Measure and Cut Foam Board Insulation Like a Pro
Foam board cutting requires the right tools and technique. Building science studies show that proper foam board insulation installation can reduce heating costs by 15-25% annually. A utility knife works for thin boards, but for thicker insulation, invest in a proper foam board cutter or use a fine-toothed saw.
Measuring accurately is crucial. I learned to measure twice, cut once – especially with six kids generating enough chaos to distract anyone. Foam board isn’t cheap, and mistakes add up quickly.
Account for electrical outlets and obstacles during your measuring. I create a simple paper template for complex areas – it’s much easier to adjust a paper pattern than to recut expensive insulation.
Cut boards slightly oversized rather than undersized. You can always trim a little more, but you can’t add material back. A snug fit is what you’re after – tight enough to eliminate gaps, but not so tight that you have to force boards into place.
When cutting around electrical boxes, turn off the power first (obviously), and use the box itself as a template. Trace around it, then cut about 1/8 inch inside your line. This gives you room for adjustment while still maintaining a tight fit.
Step 7: Apply Adhesive the Way It’s Meant to Work
Foam board adhesive application is where many DIY projects go wrong. More isn’t always better, and technique matters more than quantity. Testing by the Adhesive and Sealant Council shows that proper adhesive application techniques can increase bond strength by up to 60% compared to common DIY mistakes.
Apply adhesive to the back of the foam boards, not the wall. This gives you better control and ensures even distribution. Use a notched trowel to create ridges – these ridges help with proper adhesion and allow for slight irregularities in the wall surface.
Work in sections. Don’t apply adhesive to more boards than you can install in about 10-15 minutes. Most adhesives have a working time, and you don’t want them to skin over before you get the board in place.
The pattern of adhesive application matters. I use a grid pattern – adhesive around the perimeter of the board, then strips every 12-16 inches vertically. This provides good contact while allowing any trapped air to escape.
Here’s a technique I learned from a professional installer: slightly warm the adhesive if you’re working in cold conditions. Cold adhesive doesn’t spread as well and may not bond properly. But don’t overdo it – too much heat can change the adhesive properties.
Step 8: Install Insulation with Precision and Patience
Installing foam board insulation is like putting together a puzzle – every piece needs to fit properly for the whole system to work. Proper basement wall preparation ensures that each piece of foam board insulation performs to its rated R-value, maximizing energy efficiency.
Start with your largest, most regular areas first. This helps you establish a rhythm and technique before tackling the tricky spots around utilities and corners.
Press firmly but don’t over-compress. You want good contact between the adhesive and the wall, but excessive pressure can squeeze out adhesive and create weak spots.
Use temporary fasteners if needed, but be careful not to over-tighten screws. Foam board can compress and crack if you’re too aggressive. I use just enough pressure to hold the board in place while the adhesive cures.
Check for level and plumb as you go. A slight error early in the installation can compound into major problems by the time you reach the opposite end of the wall.
Work methodically. I typically start at one corner and work my way across, installing one vertical row at a time. This approach helps maintain straight lines and makes it easier to catch and correct problems early.
Step 9: Seal Every Joint and Gap
Sealing joints between foam boards is absolutely critical for energy efficiency. Even small gaps can create thermal bridges that significantly reduce your insulation’s effectiveness. Research from Lawrence Berkeley National Laboratory demonstrates that air leaks through unsealed joints can reduce insulation performance by 25-40%.
Use the same adhesive for sealing that you used for installation. This ensures compatibility and proper bonding between materials.
Apply sealant with a putty knife or caulking gun, depending on the size of the gap. For very small gaps, a bead of adhesive applied with a caulking gun works well. For larger gaps, you might need to use a putty knife to work the material into the joint properly.
Don’t forget the top and bottom edges. These are often overlooked, but they’re just as important as the joints between boards.
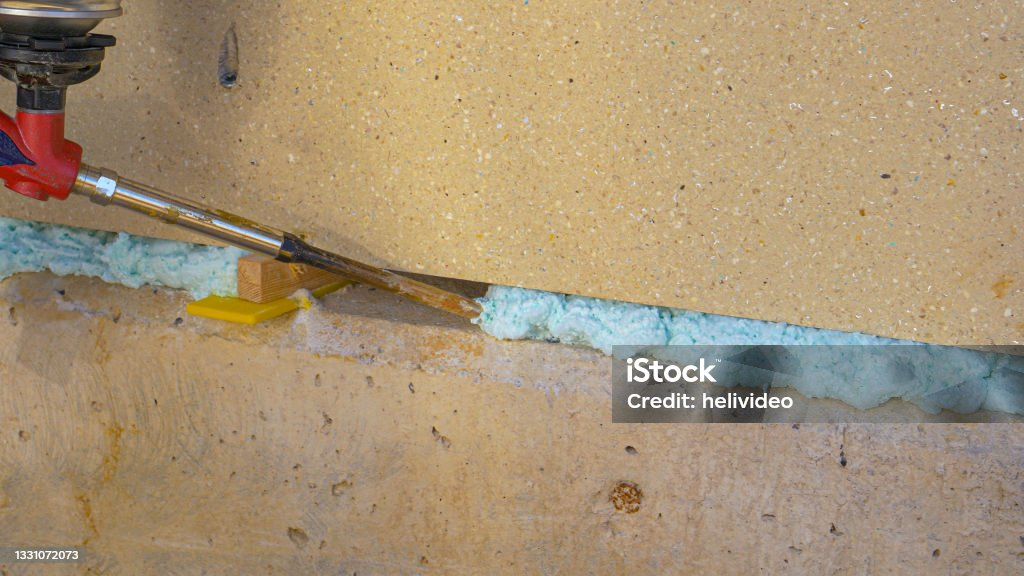
Expanding spray foam can be useful for irregular gaps, but use it sparingly. It expands more than you think, and excess foam is difficult to remove cleanly.
I learned to keep a damp rag handy while sealing joints. Clean up excess adhesive immediately – it’s much easier than trying to remove it after it cures.
Step 10: Complete the Details That Make the Difference
Insulating rim joists and corners requires special attention because these areas are prone to air leakage. The rim joist area (where the floor joists meet the foundation wall) is often the biggest source of air infiltration in basements. Studies by the Department of Energy show that rim joist sealing alone can reduce air infiltration by up to 15%.
Use expanding spray foam for these irregular areas, but read the manufacturer’s instructions carefully. Some spray foams are better for specific applications than others.
When reinstalling electrical outlets, take time to do it right. Cut openings carefully, and make sure the foam board doesn’t interfere with the electrical box mounting. Safety first – always turn off power before working around electrical components.
The finishing touches matter. Whether you’re leaving the foam board exposed (check local codes), installing a vapor barrier, or covering with drywall, follow the manufacturer’s recommendations for your specific product.
Some foam boards off-gas or have flammability concerns that require specific covering materials. The International Building Code requires thermal barriers over certain types of foam insulation for fire safety. Don’t skip this research – it’s about both performance and safety.
Common Mistakes That Cost Time, Money, and Comfort
After years of home improvement projects and helping neighbors with their basement issues, I’ve seen the same mistakes repeated over and over. Here are the big ones to avoid:
Rushing the exterior prep work. I can’t emphasize this enough – fix drainage issues first, or you’ll be redoing this project in a few years.
Skipping the inspection phase. Those small cracks you ignore now will be big problems later. Address them during prep, not after your beautiful new walls start showing problems.
Using the wrong adhesive for your conditions. Cold weather, high humidity, or specific foam board types may require specific adhesives. Read the labels and follow recommendations.
Over-tightening mechanical fasteners. Foam board compresses easily, and once it’s compressed, it doesn’t spring back. Use just enough pressure to hold boards in place.
Ignoring building codes. Some areas have specific requirements for basement insulation, especially regarding fire safety. Check with your local building department before starting.
Not planning for utilities. Think through how your insulation will affect access to electrical panels, plumbing shutoffs, and other utilities. Plan your layout accordingly.
When to Call in Professional Help
Look, I’m all for DIY projects. With six kids, saving money on labor costs means more resources for their activities and needs. But some situations require professional expertise:
Major structural issues – if you find significant cracks, bowing walls, or other structural concerns, get a professional opinion before proceeding.
Complex moisture problems – if you have active leaking, high water tables, or repeated moisture issues, a waterproofing professional can save you from costly mistakes.
Electrical complications – if your project involves moving or adding electrical components, hire a qualified electrician. It’s not worth risking your family’s safety.
Building code questions – if you’re unsure about local requirements, especially for finished basements, consult with professionals who know local codes.
The Long-Term Benefits of Doing It Right
Proper basement wall preparation pays dividends for years to come. Our basement project was completed over five years ago, and it still performs exactly as intended. No moisture issues, no temperature fluctuations, and most importantly, it’s a space our family actually enjoys using.
Energy savings are real and measurable. According to EPA Energy Star data, proper basement insulation can reduce whole-house energy consumption by 10-15%. Our heating and cooling costs dropped noticeably after completing the basement insulation project. In our case, the project paid for itself in energy savings within about three years.
Comfort improvements extend beyond just temperature control. A properly prepared and insulated basement doesn’t have that damp, musty smell that makes spaces unpleasant to use.
Property value increases when you have a properly finished basement space. But more importantly, you have additional usable square footage for your family.
Your Next Steps
Basement wall preparation really doesn’t need to be difficult if you approach it systematically and don’t cut corners on the foundation work. Modern building science provides clear guidelines for moisture control and insulation performance – follow these principles, and you’ll have results that last for decades. Take time to do each step properly, and you’ll have results that last for decades.
Start with that exterior inspection and drainage work. Then move methodically through wall inspection, cleaning, repairs, and insulation installation. Each step builds on the previous one, so don’t rush the process.
Remember, this isn’t just about creating more usable space – it’s about creating a healthier, more comfortable environment for your family. Whether you need a quiet homework space for the kids, a workshop area, or just dry storage that doesn’t smell musty, proper wall preparation is your foundation for success.
For more detailed guidance on related topics, check out our comprehensive guide to weight loss or explore our family fitness activities for ways to stay active together while your basement project comes together.
The key is starting with realistic expectations and a solid plan. Your basement doesn’t have to be perfect to be functional and comfortable. Focus on doing the preparation work correctly, and the rest will follow naturally.
Check out my guide on Gumroad titled “New Homeowner Drainage & Leak Survival Guide (Foundations Edition)“. You’ll get a clear, step-by-step system for diagnosing water problems in your home, with practical decision rules that help you determine what’s safe to fix yourself, what needs monitoring, and when it’s time to call a professional. The guide walks through common exterior drainage issues, interior plumbing and moisture problems, seasonal water threats, and condensation misdiagnoses, all explained in plain language. You’ll also learn how to properly document issues for insurance or contractors, reduce panic when water appears, and prevent small problems from turning into expensive repairs.
🌐 Explore More from My Family of Blogs
If you found this article helpful, you might also enjoy what I’m sharing across my other platforms. Each one is designed to uplift, equip, and inspire families in real, practical ways:
🏠 Mountains Will Move
Faith-based encouragement for everyday families. I dive into prayer, parenting, purpose, and pressing through life’s hardest seasons with Jesus at the center.
👉 Visit Mountains Will Move »
🔎 Everyday Exposed
My no-filter truth hub—where I tackle myths, challenge misleading narratives, and bring clarity to the conversations that matter most.
👉 Visit Everyday Exposed »
Whether you’re diving deeper into pet care, faith, or uncovering truth in today’s noisy world, I hope you’ll journey with me.
Thank you for being part of the journey. God Bless you and your family. 🙏